Boiling an egg seems simple. But if you’ve ever ended up with green yolks, cracked shells, or impossible-to-peel whites, you know there’s more to it than just tossing eggs in water. Want a foolproof method to get perfectly cooked, easy-to-peel hard-boiled eggs every time? This guide breaks it down step-by-step with no fluff—just results you can trust.
Why This Method Works So Well
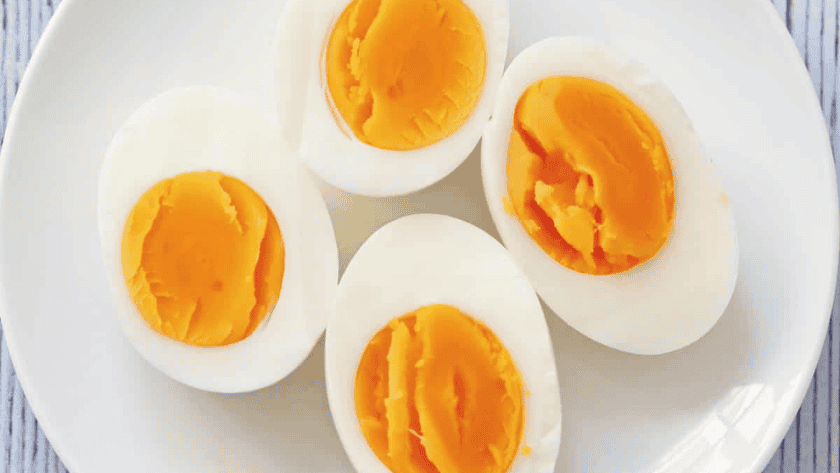
Consistency matters in cooking. This technique gives you bright yellow yolks, firm whites, and most importantly, eggs that peel cleanly without stress.
Other Popular Recipes
Key Benefits of This Recipe
- Easy to Peel – No more fighting with stubborn shells.
- No Green Ring – Proper temperature control avoids overcooking.
- Simple Steps – Only a few ingredients and tools.
- Scalable – Works with 1 egg or a dozen.
Let’s walk through the full process.
Ingredients You’ll Need
You don’t need anything fancy—just a few kitchen staples.
- 6 large eggs (older eggs peel easier than fresh)
- Water (enough to cover eggs by 1 inch)
- Ice (for an ice bath)
That’s it. Simplicity is the secret here.
Essential Equipment
- Medium or large saucepan
- Slotted spoon or tongs
- Bowl (for ice bath)
- Timer (or phone stopwatch)
Step-by-Step Instructions for Perfect Hard-Boiled Eggs
Step 1: Place Eggs in a Pot
Start by placing your eggs in a single layer in a pot. Don’t stack them—they need space to cook evenly.
Step 2: Cover with Cold Water
Fill the pot with cold water, covering the eggs by about an inch. Starting cold ensures gentle cooking, reducing the risk of cracking.
Step 3: Bring to a Boil (But Not for Long!)
Place the pot on medium-high heat. As soon as it reaches a rolling boil, stop right there.
Step 4: Turn Off the Heat and Cover
Once the water boils, turn off the heat and immediately cover the pot with a lid. Let the eggs sit in the hot water.
Step 5: Let Eggs Sit Based on Desired Doneness
Here’s the breakdown:
- 10 minutes – Creamy yolk, perfect for ramen.
- 11–12 minutes – Classic hard-boiled texture.
- 13 minutes – Extra firm, best for slicing or salads.
Use a timer. Precision makes all the difference.
Step 6: Prepare an Ice Bath
While the eggs sit, fill a bowl with cold water and lots of ice. This halts cooking instantly and makes peeling much easier.
Step 7: Transfer Eggs to the Ice Bath
Use tongs or a slotted spoon to move the eggs from the pot into the ice bath. Chill for at least 10–15 minutes.
Step 8: Peel and Enjoy
Tap the egg gently on the counter, then roll it to crack the shell. Start peeling at the wider end where there’s an air pocket. The shell should come off easily.
Why Are Some Eggs Harder to Peel Than Others?
Fresh eggs have a lower pH level, which causes the whites to stick to the shell. Older eggs allow air to seep in through the shell over time, raising the pH and loosening the bond. If your eggs are straight from the farm or store, let them sit for 5–7 days before boiling.
How to Store Hard-Boiled Eggs
Hard-boiled eggs should be stored in the fridge. Keep them unpeeled for the best freshness.
- Unpeeled: Up to 7 days in the refrigerator.
- Peeled: Store in an airtight container with a damp paper towel and use within 3–4 days.
Label the container with the date for easy tracking.
What to Serve with Hard-Boiled Eggs
Hard-boiled eggs are incredibly versatile. Here are a few ideas:
- Toss into salads for added protein.
- Slice into sandwiches for texture and flavor.
- Mash into egg salad for a quick lunch.
- Serve with toast and avocado for a hearty breakfast.
Expert Tips for Perfect Results
- Use older eggs – They peel easier than fresh ones.
- Avoid rapid boiling – Boiling too hard can crack the shells.
- Don’t skip the ice bath – It’s the secret weapon for easy peeling.
- Peel under running water – Helps separate the shell from the membrane.
- Use a spoon – Slide it under the shell if peeling is tough.
Common Mistakes to Avoid
- Overcooking – This leads to rubbery whites and green rings.
- No ice bath – Skipping it makes peeling a nightmare.
- Cracking the eggs in hot water – Start with cold water to avoid shock.
Best Time to Make Hard-Boiled Eggs
They’re great to prep ahead:
- Sunday night for the week’s snacks
- Morning of a picnic or road trip
- Just before meal prep for salads or bentos
How Many Eggs Can I Boil at Once?
As many as you like, as long as:
- They’re in a single layer.
- Water covers them by 1 inch.
- You use a large enough pot.
No crowding. Eggs need space to cook evenly.
Can I Reheat Hard-Boiled Eggs?
Yes, but gently. Here’s how:
- In hot water: Place peeled eggs in hot (not boiling) water for 5–10 minutes.
- In the microwave: Cut in half and cover with a damp paper towel. Microwave in short bursts. Don’t microwave whole eggs—they’ll explode.
How to Add Flavor to Hard-Boiled Eggs
Try soaking peeled eggs in:
- Soy sauce and vinegar (for Asian-style eggs)
- Pickled beet juice (for beautiful pink eggs)
- Herbed olive oil (for a Mediterranean twist)
It’s an easy way to elevate a basic snack.
Health Benefits of Hard-Boiled Eggs
They’re packed with:
- Protein – Great for satiety and muscle repair.
- Choline – Important for brain health.
- Healthy fats – In the yolk.
- Vitamins – B12, D, A, and more.
And they’re low in calories—around 70 calories per egg.
FAQs
Why do my eggs have a green ring around the yolk?
This happens when eggs are overcooked. The sulfur in the white reacts with the iron in the yolk, causing a greenish-gray ring. Use a timer and don’t let them sit in hot water too long.
Should I add salt or vinegar to the boiling water?
Vinegar can help make peeling easier if the shell cracks slightly. Salt doesn’t do much for peeling but may prevent eggs from cracking.
What’s the best way to peel a hard-boiled egg?
Crack the shell all over and start peeling from the wider bottom where the air pocket is. Peeling under running water can also help remove the membrane cleanly.
Can I freeze hard-boiled eggs?
You can freeze the yolks, but not the whites—they turn rubbery. For best results, keep hard-boiled eggs refrigerated and consume within a week.
Final Thoughts
Making perfect hard-boiled eggs isn’t about guesswork. It’s about timing, temperature, and technique. Once you’ve got those dialed in, you’ll never settle for cracked shells or overcooked yolks again.
Try this method once, and you’ll wonder why you didn’t learn it sooner.