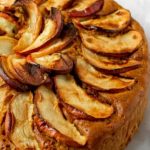
Mary Berry’s 8-inch Sponge Cake is a timeless classic, loved for its light, fluffy texture and simple, elegant flavor. Ideal for celebrations or afternoon tea, this versatile sponge can be filled with buttercream, jam, or fresh fruit. It’s the perfect base for a wide range of delicious cakes, making it a go-to recipe for any occasion.
What is Mary Berry’s 8-inch Sponge Cake?
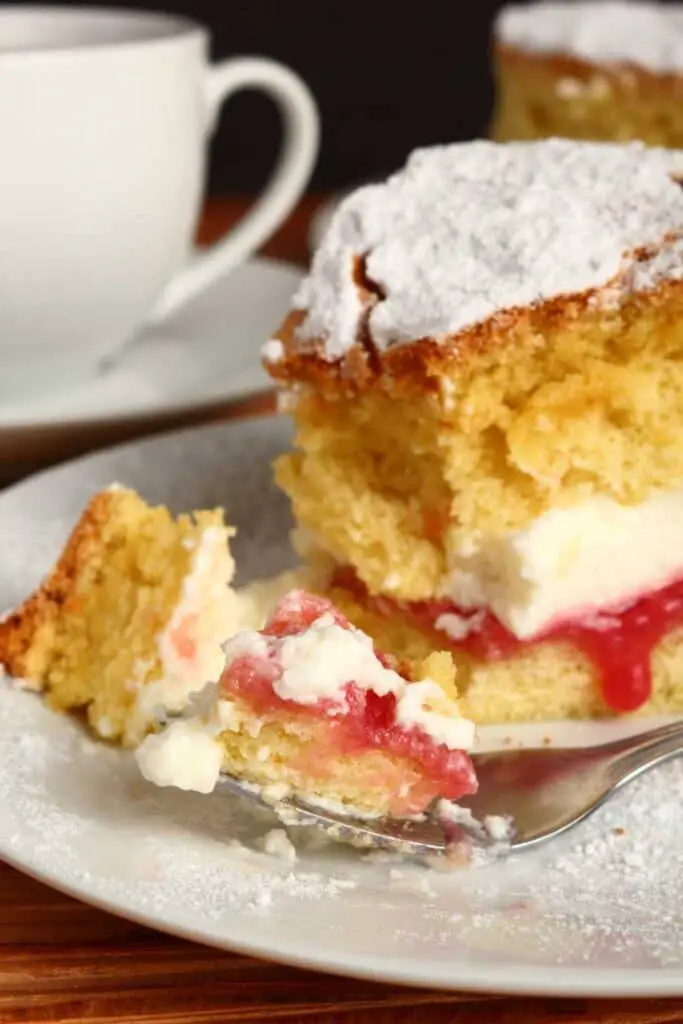
Mary Berry’s 8-Inch Sponge Cake is a traditional British cake made with a simple combination of butter, sugar, eggs, and flour. This cake is baked in two 8-inch cake tins and can be layered with buttercream, jam, or whipped cream for a perfect finish.
Other Popular Recipes
- Mary Berry All-In-One Victoria Sponge Cake
- Mary Berry Victoria Sponge with Buttercream
- Mary Berry 9 Inch Sponge Cake
Ingredients Needed to Make Mary Berry 8-inch Sponge Cake
- 225g unsalted butter (softened)
- 225g caster sugar
- 225g self-raising flour
- 4 large eggs
- 2 tsp baking powder
- 1 tsp vanilla extract (optional)
- 2-3 tbsp milk (if needed, to loosen the batter)
Instructions to Make Mary Berry 8-Inch Sponge Cake
Step 1: Preheat the Oven
Preheat your oven to 180°C (350°F). Grease two 8-inch round cake tins and line the bottoms with parchment paper.
Step 2: Cream the Butter and Sugar
In a large mixing bowl, beat the softened butter and caster sugar together using an electric mixer or hand whisk until pale, light, and fluffy. This should take about 2-3 minutes.
Step 3: Add the Eggs
Beat the eggs in a small bowl, then gradually add them to the butter and sugar mixture, one at a time, beating well after each addition. If the mixture starts to curdle, add a tablespoon of the self-raising flour to bring it back together.
Step 4: Sift in the Flour
Sift the self-raising flour and baking powder into the bowl, and gently fold it into the batter using a spatula or wooden spoon. Add the vanilla extract (if using) at this stage. If the mixture is too thick, add 2-3 tablespoons of milk to loosen it slightly.
Step 5: Divide the Batter
Divide the batter evenly between the two prepared cake tins, smoothing the tops with a spatula.
Step 6: Bake the Cakes
Place the tins in the preheated oven and bake for 20-25 minutes, or until the cakes are golden brown and spring back when gently pressed in the center. A skewer inserted into the middle should come out clean.
Step 7: Cool the Cakes
Once baked, remove the cakes from the oven and let them cool in their tins for about 5 minutes. Then, turn them out onto a wire rack to cool completely.
Step 8: Fill and Assemble (Optional)
Once the cakes are completely cool, you can sandwich them together with your choice of filling. Spread buttercream, jam, or whipped cream on one of the cakes, then place the other cake on top. Dust with icing sugar for a classic finish.
Pro Tips for Making the Best Mary Berry 8-Inch Sponge Cake
- Cream the butter and sugar well: This step is crucial to creating a light and airy sponge, so take your time to beat until pale and fluffy.
- Room temperature ingredients: Make sure the butter and eggs are at room temperature for a smoother batter and better texture.
- Don’t overmix: Gently fold in the flour to avoid knocking out the air that helps the cake rise.
- Test for doneness: Check the cakes are baked by inserting a skewer into the center; it should come out clean.
How Do I Store Mary Berry 8-Inch Sponge Cake?
Store the sponge cake in an airtight container at room temperature for up to 3 days. If filled with cream or buttercream, store it in the fridge and allow it to come to room temperature before serving. You can also freeze the unfilled sponges for up to 3 months—just wrap them well in cling film and foil.
Nutrition Value (per serving):
- Calories: 350
- Fat: 18g
- Carbohydrates: 45g
- Protein: 5g
- Sugar: 30g
- Fiber: 1g
FAQs
Can I freeze Mary Berry’s 8-inch sponge cake?
Yes, you can freeze the unfilled sponge cake. Wrap each layer tightly in cling film and then in foil to prevent freezer burn. It can be frozen for up to 3 months. Thaw at room temperature before assembling with any fillings.
How do I make my sponge cake more moist?
To make your sponge cake more moist, ensure you don’t overbake it. Adding a few tablespoons of milk to the batter can also help. Additionally, using room-temperature butter and eggs will create a smoother batter that retains moisture.
Can I make this sponge cake with plain flour instead of self-raising flour?
Yes, you can substitute self-raising flour with plain flour, but you’ll need to add baking powder. Use 2 teaspoons of baking powder for every 225g of plain flour to achieve the same rise.
How can I prevent my sponge cake from sinking in the middle?
To prevent the sponge cake from sinking, make sure not to open the oven door too early while baking. Also, ensure your oven is fully preheated before placing the cakes inside, and avoid overmixing the batter, which can deflate the air needed for a good rise.
Final Words
This Mary Berry 8-inch Sponge Cake Recipe is the perfect base for any celebration or teatime treat. Light, fluffy, and easy to make, this sponge cake can be customized with your favorite fillings and toppings for a classic dessert that never goes out of style. Enjoy!
More By British Baking Recipes
- James Martin Victoria Sponge
- Mary Berry 10-Inch Sponge Cake
- Mary Berry Yoghurt Cake
- Mary Berry Genoise Sponge Cake

Mary Berry 8 Inch Sponge Cake recipe
- Prep Time: 15
- Cook Time: 25
- Total Time: 40 minutes
- Yield: 8 1x
- Category: Dessert
- Method: Baking
- Cuisine: British
Description
Mary Berry’s 8-Inch Sponge Cake is a traditional British cake made with a simple combination of butter, sugar, eggs, and flour. This cake is baked in two 8-inch cake tins and can be layered with buttercream, jam, or whipped cream for a perfect finish.
Ingredients
- 225g unsalted butter (softened)
- 225g caster sugar
- 225g self-raising flour
- 4 large eggs
- 2 tsp baking powder
- 1 tsp vanilla extract (optional)
- 2–3 tbsp milk (if needed, to loosen the batter)
Instructions
Step 1: Preheat the Oven
Preheat your oven to 180°C (350°F). Grease two 8-inch round cake tins and line the bottoms with parchment paper.
Step 2: Cream the Butter and Sugar
In a large mixing bowl, beat the softened butter and caster sugar together using an electric mixer or hand whisk until pale, light, and fluffy. This should take about 2-3 minutes.
Step 3: Add the Eggs
Beat the eggs in a small bowl, then gradually add them to the butter and sugar mixture, one at a time, beating well after each addition. If the mixture starts to curdle, add a tablespoon of the self-raising flour to bring it back together.
Step 4: Sift in the Flour
Sift the self-raising flour and baking powder into the bowl, and gently fold it into the batter using a spatula or wooden spoon. Add the vanilla extract (if using) at this stage. If the mixture is too thick, add 2-3 tablespoons of milk to loosen it slightly.
Step 5: Divide the Batter
Divide the batter evenly between the two prepared cake tins, smoothing the tops with a spatula.
Step 6: Bake the Cakes
Place the tins in the preheated oven and bake for 20-25 minutes, or until the cakes are golden brown and spring back when gently pressed in the center. A skewer inserted into the middle should come out clean.
Step 7: Cool the Cakes
Once baked, remove the cakes from the oven and let them cool in their tins for about 5 minutes. Then, turn them out onto a wire rack to cool completely.
Step 8: Fill and Assemble (Optional)
Once the cakes are completely cool, you can sandwich them together with your choice of filling. Spread buttercream, jam, or whipped cream on one of the cakes, then place the other cake on top. Dust with icing sugar for a classic finish.