The Mary Berry Fridge Cake is a luscious and easy-to-make dessert that requires no baking. Combining layers of crunchy biscuits with a creamy filling, this cake is perfect for busy weeknights, special occasions, or any time you crave a sweet treat. Its delightful texture and rich flavors make it a favorite among both novice and experienced bakers. With minimal ingredients and straightforward steps, Mary Berry’s fridge cake is a versatile dessert that can be customized to suit your taste.
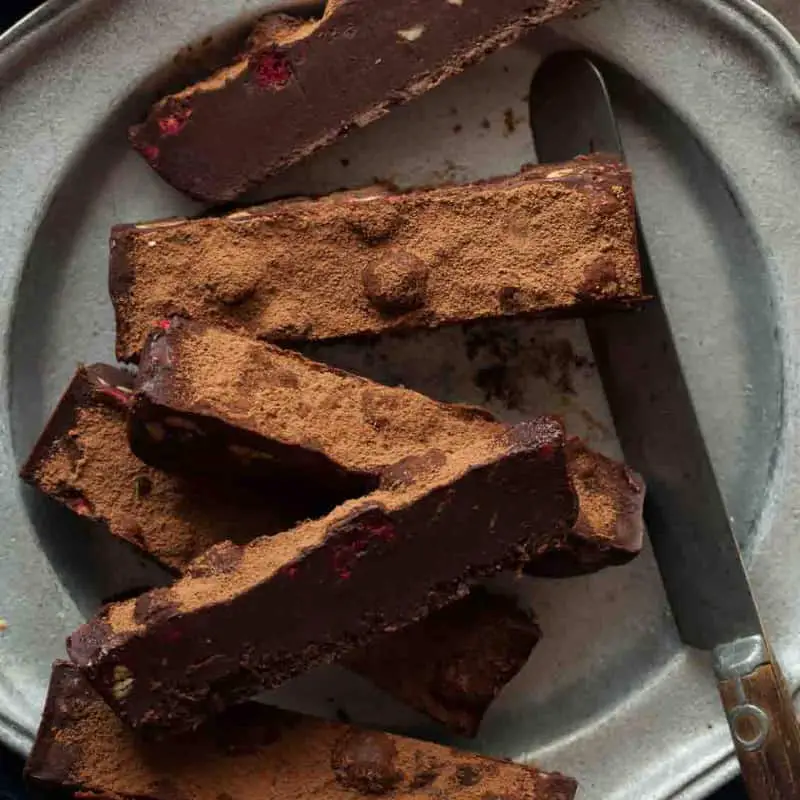
Mary Berry Fridge Cake
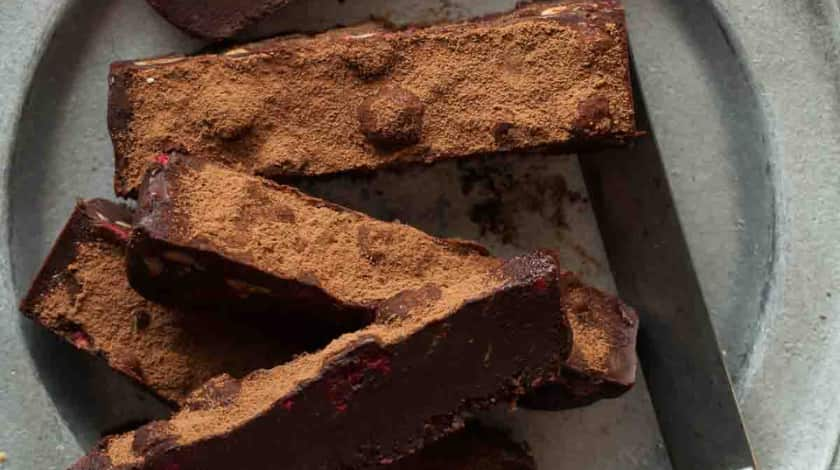
Mary Berry’s Fridge Cake is a no-bake dessert that layers crunchy biscuits with a smooth, creamy filling. Typically set in the refrigerator until firm, this cake boasts a perfect balance of textures and flavors. The filling can vary from whipped cream and chocolate to fruit-based creams, allowing for endless customization. Often garnished with toppings such as chocolate shavings, fresh fruits, or nuts, this cake is as visually appealing as it is delicious.
Other Popular Recipes
Why You Should Try This Recipe
- No Baking Required: Perfect for those who prefer not to use the oven.
- Quick and Easy: Minimal preparation time makes it ideal for last-minute desserts.
- Versatile: Easily customizable with your favorite flavors and add-ins.
- Perfect Texture: Combines crunchy biscuits with a smooth, creamy filling.
- Impressive Presentation: Looks elegant on any dessert table, suitable for special occasions.
Ingredients Needed to Make Mary Berry Fridge Cake
For the Biscuit Base:
- Digestive biscuits: 200g (7 oz), roughly crushed
- Butter: 100g (3.5 oz), melted
For the Cream Filling:
- Whipping cream: 300ml (10 fl oz), chilled
- Cream cheese: 150g (5 oz), softened
- Caster sugar: 100g (3.5 oz), for sweetness
- Vanilla extract: 1 teaspoon, for flavor
For the Topping:
- Chocolate shavings: 50g (1.75 oz), for garnish
- Fresh berries: 100g (3.5 oz), such as strawberries or raspberries
- Mint leaves: A few, for decoration (optional)
Optional Add-ins:
- Fruit jam or preserves: 2 tablespoons, for added flavor
- Liqueur: 2 tablespoons, such as Amaretto or Baileys, for an adult version
- Nuts: 50g (1.75 oz), chopped, for added crunch
Equipment
- Springform cake tin: 23cm (9-inch) in diameter, lined with parchment paper
- Mixing bowls: For preparing ingredients
- Electric mixer: For whipping cream and blending fillings
- Spatula: For folding ingredients
- Measuring cups and spoons: For accurate measurements
- Cooling rack: Set the cake in the fridge
- Knife: For slicing the cake
Instructions to Prepare Mary Berry Fridge Cake
Step 1. Prepare the Biscuit Base
- Crush the Biscuits: Place the digestive biscuits in a large mixing bowl and roughly crush them using a rolling pin or the back of a spoon until they resemble coarse crumbs.
- Combine with Butter: Pour the melted butter over the crushed biscuits and mix until all the crumbs are evenly coated.
- Press into Tin: Transfer the biscuit mixture to the prepared springform tin. Use the back of a spoon or the base of a glass to press the crumbs firmly and evenly into the bottom of the tin to form the base.
- Chill: Place the biscuit base in the refrigerator to set while you prepare the cream filling.
Step 2. Make the Cream Filling
- Whip the Cream: In a chilled mixing bowl, use an electric mixer to whip the whipping cream until it forms soft peaks.
- Blend Cream Cheese and Sugar: In a separate bowl, beat together the cream cheese and caster sugar until smooth and creamy.
- Combine Ingredients: Gently fold the whipped cream into the cream cheese mixture using a spatula until well combined and smooth.
- Add Vanilla: Stir in the vanilla extract to enhance the flavor of the filling.
- Optional Add-ins: If desired, fold in fruit jam, liqueur, or chopped nuts at this stage for added flavor and texture.
Step 3. Assemble the Cake
- Layer the Filling: Remove the biscuit base from the refrigerator. Spread the cream filling evenly over the chilled biscuit base using a spatula.
- Smooth the Surface: Smooth the top of the cream layer to ensure an even surface for decorating.
- Chill Again: Place the assembled cake back into the refrigerator and let it set for at least 4 hours, preferably overnight, until the filling is firm.
Step 4. Decorate the Cake
- Add Chocolate Shavings: Once the cake is set, remove it from the fridge. Sprinkle chocolate shavings evenly over the top of the cream filling.
- Top with Fresh Berries: Arrange fresh berries around the edge or in the center of the cake for a pop of color and freshness.
- Garnish with Mint: Add a few mint leaves for an elegant touch, if desired.
Step 5. Serve the Cake
- Release from Tin: Carefully remove the springform tin by unclipping the sides and lifting the cake out using the parchment paper overhang.
- Slice and Enjoy: Use a sharp knife to slice the fridge cake into portions. Serve chilled for the best texture and flavor.
What Goes Well With Mary Berry Fridge Cake
- Fresh Berries: Enhance the fruity flavors with extra berries on the side.
- Whipped Cream: Adds an extra layer of creaminess to each slice.
- Ice Cream: A scoop of vanilla or fruit-flavored ice cream complements the cake beautifully.
- Coffee or Tea: Perfect accompaniment for a delightful afternoon treat.
- Chocolate Sauce: Drizzle melted chocolate or caramel sauce for added indulgence.
Expert Tips for Making the Best Mary Berry Fridge Cake
- Chill the Cream: Ensure the whipping cream is well-chilled before whipping for the best volume and texture.
- Don’t Overmix: When folding the whipped cream into the cream cheese mixture, do so gently to maintain the lightness of the filling.
- Firm Base: Press the biscuit base firmly into the tin to prevent it from crumbling when slicing the cake.
- Flavor Enhancements: Experiment with different extracts, such as almond or orange, to add unique flavors to the filling.
- Even Layers: Spread the cream filling evenly to ensure consistent texture and flavor in every slice.
Easy Variations of Mary Berry Fridge Cake
- Chocolate and Hazelnut: Add melted chocolate and chopped hazelnuts to the cream filling for a rich, nutty flavor.
- Strawberry and Cream: Layer fresh strawberries between the biscuit base and cream filling for an extra fruity twist.
- Lemon and Blueberry: Incorporate lemon zest and fresh blueberries into the filling for a zesty, refreshing flavor.
- Coconut Delight: Mix shredded coconut into the cream filling and top with toasted coconut flakes.
- Coffee Lovers: Add a splash of coffee liqueur to the cream filling and top with chocolate-covered espresso beans.
Best Practices to Store Mary Berry Fridge Cake
- Refrigeration: Keep the cake refrigerated in an airtight container for up to 5 days. The chilled filling maintains its texture and freshness.
- Freezing: The fridge cake can be frozen for up to 2 months. Wrap it tightly in plastic wrap and then in aluminum foil or place it in a freezer-safe container. Thaw in the refrigerator overnight before serving.
- Room Temperature: If the cake will be consumed within a day, it can be stored at room temperature and covered with a clean kitchen towel to protect it from drying out.
Best Practices to Reheat Mary Berry Fridge Cake
- Microwave: For a quick treat, warm individual slices in the microwave for 10-15 seconds. Be careful not to overheat, as the cream filling may become too soft.
- Room Temperature: Allow the cake to sit at room temperature for about 15 minutes before serving to enhance its flavor and texture.
- Oven: Gently warm the entire cake in a low-temperature oven (around 150°C/300°F) for about 10 minutes if you prefer a slightly warmer dessert.
How Can I Make Mary Berry Fridge Cake Healthier?
- Reduce Sugar: Decrease the amount of caster sugar in the filling or use a natural sweetener like honey or maple syrup.
- Whole Grain Biscuits: Use whole grain or digestive biscuits to add fiber and nutrients to the base.
- Low-Fat Ingredients: Opt for low-fat cream cheese and whipping cream to reduce the overall fat content.
- Add Fruits: Incorporate fresh fruits like berries or kiwi for added vitamins and antioxidants.
- Nut Alternatives: Use nuts sparingly or choose lower-fat nuts like almonds instead of walnuts or pecans.
Nutrition Value (per slice)
- Calories: 320 kcal
- Protein: 6g
- Fat: 18g
- Carbohydrates: 35g
- Sugar: 20g
- Fiber: 2g
FAQs
Can I use different types of biscuits for the base in Mary Berry Fridge Cake?
Yes, you can experiment with various types of biscuits such as digestive biscuits, graham crackers, or even chocolate biscuits for a different flavor profile. Ensure that the biscuits are roughly crushed to maintain the crunchy texture of the base.
How long does the fridge cake need to be set before it’s ready to serve?
The fridge cake should be chilled for at least 4 hours, preferably overnight, to ensure the filling is firm and the layers are set properly. This allows the flavors to meld and the texture to become cohesive.
Can I make the filling ahead of time?
Yes, you can prepare the cream filling up to two days in advance. Store it in an airtight container in the refrigerator until you’re ready to assemble the cake. This can help save time when you’re preparing the dessert.
Is it possible to make a dairy-free version of Mary Berry Fridge Cake?
Absolutely! Substitute the butter with a plant-based alternative, use dairy-free cream cheese, and opt for coconut or almond-based whipping cream. Ensure that all other ingredients, such as biscuits and flavorings, are also dairy-free to cater to dietary preferences or restrictions.
Final Words
The Mary Berry Fridge Cake is a versatile and elegant dessert that brings together the perfect combination of crunchy biscuits and creamy filling. Its no-bake nature makes it an ideal choice for those looking to prepare a delicious cake without the hassle of using the oven.
Enjoy this classic British treat and the ease of preparation that Mary Berry’s recipes are renowned for!
More By British Baking Recipes
Print
Mary Berry Fridge Cake Recipe
- Prep Time: 30
- Total Time: 30 minutes
- Yield: 12
- Category: Dessert
- Method: Refrigerating
- Cuisine: British
Description
Mary Berry’s Fridge Cake is a no-bake dessert that layers crunchy biscuits with a smooth, creamy filling. Typically set in the refrigerator until firm, this cake boasts a perfect balance of textures and flavors. The filling can vary from whipped cream and chocolate to fruit-based creams, allowing for endless customization. Often garnished with toppings such as chocolate shavings, fresh fruits, or nuts, this cake is as visually appealing as it is delicious.
Ingredients
For the Biscuit Base:
- Digestive biscuits: 200g (7 oz), roughly crushed
- Butter: 100g (3.5 oz), melted
For the Cream Filling:
- Whipping cream: 300ml (10 fl oz), chilled
- Cream cheese: 150g (5 oz), softened
- Caster sugar: 100g (3.5 oz), for sweetness
- Vanilla extract: 1 teaspoon, for flavor
For the Topping:
- Chocolate shavings: 50g (1.75 oz), for garnish
- Fresh berries: 100g (3.5 oz), such as strawberries or raspberries
- Mint leaves: A few, for decoration (optional)
Optional Add-ins:
- Fruit jam or preserves: 2 tablespoons, for added flavor
- Liqueur: 2 tablespoons, such as Amaretto or Baileys, for an adult version
- Nuts: 50g (1.75 oz), chopped, for added crunch
Instructions
Step 1. Prepare the Biscuit Base
- Crush the Biscuits: Place the digestive biscuits in a large mixing bowl and roughly crush them using a rolling pin or the back of a spoon until they resemble coarse crumbs.
- Combine with Butter: Pour the melted butter over the crushed biscuits and mix until all the crumbs are evenly coated.
- Press into Tin: Transfer the biscuit mixture to the prepared springform tin. Use the back of a spoon or the base of a glass to press the crumbs firmly and evenly into the bottom of the tin to form the base.
- Chill: Place the biscuit base in the refrigerator to set while you prepare the cream filling.
Step 2. Make the Cream Filling
- Whip the Cream: In a chilled mixing bowl, use an electric mixer to whip the whipping cream until it forms soft peaks.
- Blend Cream Cheese and Sugar: In a separate bowl, beat together the cream cheese and caster sugar until smooth and creamy.
- Combine Ingredients: Gently fold the whipped cream into the cream cheese mixture using a spatula until well combined and smooth.
- Add Vanilla: Stir in the vanilla extract to enhance the flavor of the filling.
- Optional Add-ins: If desired, fold in fruit jam, liqueur, or chopped nuts at this stage for added flavor and texture.
Step 3. Assemble the Cake
- Layer the Filling: Remove the biscuit base from the refrigerator. Spread the cream filling evenly over the chilled biscuit base using a spatula.
- Smooth the Surface: Smooth the top of the cream layer to ensure an even surface for decorating.
- Chill Again: Place the assembled cake back into the refrigerator and let it set for at least 4 hours, preferably overnight, until the filling is firm.
Step 4. Decorate the Cake
- Add Chocolate Shavings: Once the cake is set, remove it from the fridge. Sprinkle chocolate shavings evenly over the top of the cream filling.
- Top with Fresh Berries: Arrange fresh berries around the edge or in the center of the cake for a pop of color and freshness.
- Garnish with Mint: Add a few mint leaves for an elegant touch, if desired.
Step 5. Serve the Cake
- Release from Tin: Carefully remove the springform tin by unclipping the sides and lifting the cake out using the parchment paper overhang.
- Slice and Enjoy: Use a sharp knife to slice the fridge cake into portions. Serve chilled for the best texture and flavor.