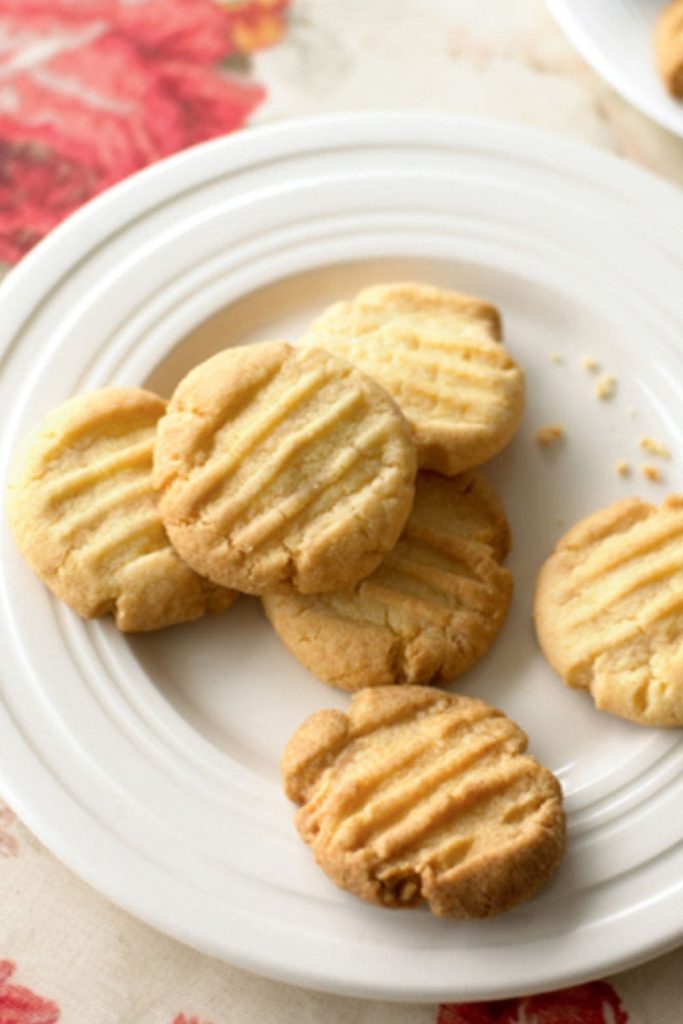
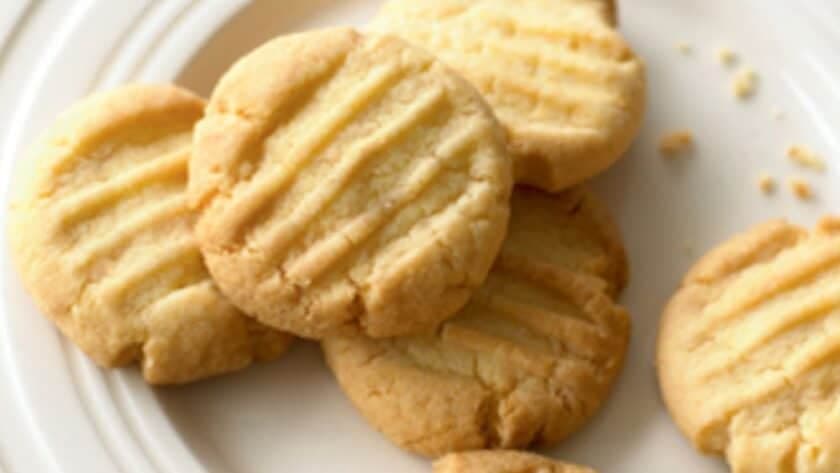
Simple, classic, and melt-in-the-mouth delicious, these Mary Berry Fork Biscuits are a timeless treat that’s as easy to make as it is delightful to eat. Named for the iconic fork marks pressed into the top before baking, these buttery biscuits are perfect for afternoon tea, homemade gifts, or as a quick bake with kids. With just three basic ingredients, Mary Berry’s version guarantees success every time—no mixer or fancy equipment required.
What are Mary Berry Fork Biscuits?
The Mary Berry Fork Biscuits are traditional British shortbread-style cookies made from just butter, flour, and sugar. They’re called “fork biscuits” because of the simple fork indentations made on top before baking. The result is a light, tender, and buttery biscuit with a delicate crumb and a touch of sweetness. Perfect with a cup of tea or a glass of milk.
Other Popular Recipes
- Mary Berry Blackcurrant Coulis
- Mary Berry Summer Fruit Terrine
- Mary Berry Vegetable Quiche
- Mary Berry Steak Marinade
Why You Should Try This Recipe
- Only 3 ingredients – Pantry staples you probably already have.
- Ready in under 30 minutes – Great for last-minute baking.
- Ideal for beginner bakers – Foolproof and straightforward.
- Perfect for kids to help with – Fun and mess-free.
- Freezer-friendly dough – Make now, bake later.
- Light and buttery texture – A true classic biscuit.
Ingredients Needed to Make Mary Berry Fork Biscuits
- Unsalted butter – 100g (softened)
- Caster sugar – 50g (¼ cup)
- Self-raising flour – 150g (1¼ cups)
Optional:
- Vanilla extract – ½ teaspoon (for extra flavor)
- Caster sugar – for sprinkling after baking
Equipment Needed
- Mixing bowl
- Wooden spoon or spatula
- Baking tray lined with parchment paper
- Fork (for shaping)
- Cooling rack
Instructions to Make Mary Berry Fork Biscuits
Step 1: Preheat and Prepare
- Preheat oven to 180°C (160°C fan) or 350°F.
- Line a baking tray with parchment paper.
Step 2: Cream Butter and Sugar
- In a mixing bowl, beat softened butter and caster sugar until light and creamy.
- Stir in vanilla extract (if using) for added depth.
Step 3: Add Flour
- Sift in self-raising flour and mix gently until a soft dough forms.
- If dough feels too soft, chill for 10 minutes to firm up slightly.
Step 4: Shape the Biscuits
- Take small amounts of dough (about a tablespoon) and roll into balls.
- Place on the baking tray, spaced apart.
- Flatten each ball gently with a fork, creating signature lines.
Step 5: Bake
- Bake for 15–18 minutes until lightly golden and set around the edges.
- Cool on the tray for 5 minutes, then transfer to a wire rack.
Step 6: Serve or Store
- Dust with a little extra sugar while still warm (optional).
- Enjoy once fully cooled, or store in an airtight container.
What Goes Well With Mary Berry Fork Biscuits
- Traditional English breakfast tea – A comforting and classic pairing.
- Hot chocolate or warm milk – Great for kids.
- Strawberry or raspberry jam – For a sweet contrast.
- Lemon curd – Adds tangy richness.
- Ice cream – Serve as a side treat or crumble on top.
- Whipped cream and berries – For an elevated dessert.
- Gift boxes or biscuit tins – Perfect homemade edible gifts.
Expert Tips for Making the Best Mary Berry Fork Biscuits
Use these tips to ensure your biscuits turn out light and buttery every time:
- Use room temperature butter – Helps cream easily with sugar.
- Don’t overwork the dough – Mix just until combined to avoid toughness.
- Chill if too soft to shape – Keeps them from spreading too much.
- Fork should be lightly floured – Prevents sticking while pressing.
- Bake on the middle rack – Ensures even cooking.
- Cool completely before storing – Prevents softness or condensation.
Easy Variations of Mary Berry Fork Biscuits
Customize the base recipe with these simple tweaks:
- Add lemon zest – For a citrusy version.
- Stir in mini chocolate chips – For a sweet twist.
- Use almond or coconut extract – A subtle flavor change.
- Dip half in melted chocolate – For a fancier finish.
- Add chopped nuts or dried fruit – For extra texture.
- Roll in demerara sugar – For a crunchy coating.
Best Practices to Store Mary Berry Fork Biscuits
- Cool completely before storing – Keeps them crisp.
- Store in an airtight container – Fresh for up to 5 days.
- Avoid humid environments – Moisture softens biscuits.
- Freeze unbaked dough balls – Wrap and store for up to 1 month.
- Thaw and bake from chilled – Add 1–2 extra minutes to baking time.
Best Practices to Reheat Mary Berry Fork Biscuits
These biscuits are best served at room temperature, but if you prefer them warm:
- Reheat in oven at 150°C (300°F) for 3–5 minutes – Lightly crisps the outside.
- Avoid microwave reheating – Makes them soft and chewy.
- Let rest before serving – Allows structure to firm up again.
How Can I Make Mary Berry’s Fork Biscuits Healthier?
- Use half wholemeal flour – Adds fiber and a nutty flavor.
- Reduce sugar slightly – Still sweet but more balanced.
- Swap butter for a dairy-free spread – Makes them suitable for vegans.
- Use stevia or coconut sugar – Natural sweetener options.
- Add ground flaxseed or oats – Boosts fiber and nutrition.
Nutrition Value (per biscuit):
- Calories: 115
- Fat: 6g
- Carbohydrates: 14g
- Sugar: 5g
- Protein: 1g
- Fiber: 0.5g
- Sodium: 25mg
FAQs
Why are they called fork biscuits?
They’re called fork biscuits because the tops are traditionally flattened using a fork before baking. This creates a distinctive, rigid pattern and helps them bake evenly.
Can I use plain flour instead of self-raising flour?
Yes, you can use plain flour. Just add 1 teaspoon of baking powder per 150g of plain flour to create a self-raising equivalent for the recipe.
Should the butter be softened before mixing?
Yes, softened butter is essential. It creams more easily with the sugar, resulting in a light and tender texture.
How do I stop fork biscuits from spreading too much in the oven?
If the dough is very soft, chill it for 10–15 minutes before baking. This helps the biscuits hold their shape and prevents excess spreading.
Final Words
This Mary Berry Fork Biscuits Recipe is the ultimate in simple home baking—quick, budget-friendly, and reliably delicious.
Try them once, and they’ll become a go-to in your baking collection.
Print
Mary Berry Fork Biscuits
- Prep Time: 10
- Cook Time: 15
- Total Time: 25 minutes
- Yield: 16 biscuits
- Category: Cookies
- Method: Baking
- Cuisine: British
Description
The Mary Berry Fork Biscuits are traditional British shortbread-style cookies made from just butter, flour, and sugar. They’re called “fork biscuits” because of the simple fork indentations made on top before baking. The result is a light, tender, and buttery biscuit with a delicate crumb and a touch of sweetness. Perfect with a cup of tea or a glass of milk.
Ingredients
-
Caster sugar – 50g (¼ cup)
-
Self-raising flour – 150g (1¼ cups)
Unsalted butter – 100g (softened)
Optional:
-
Caster sugar – for sprinkling after baking
Vanilla extract – ½ teaspoon (for extra flavor)
Instructions
Step 1: Preheat and Prepare
-
Preheat oven to 180°C (160°C fan) or 350°F.
-
Line a baking tray with parchment paper.
Step 2: Cream Butter and Sugar
-
In a mixing bowl, beat softened butter and caster sugar until light and creamy.
-
Stir in vanilla extract (if using) for added depth.
Step 3: Add Flour
-
Sift in self-raising flour and mix gently until a soft dough forms.
-
If dough feels too soft, chill for 10 minutes to firm up slightly.
Step 4: Shape the Biscuits
-
Take small amounts of dough (about a tablespoon) and roll into balls.
-
Place on the baking tray, spaced apart.
-
Flatten each ball gently with a fork, creating signature lines.
Step 5: Bake
-
Bake for 15–18 minutes until lightly golden and set around the edges.
-
Cool on the tray for 5 minutes, then transfer to a wire rack.
Step 6: Serve or Store
-
Dust with a little extra sugar while still warm (optional).
-
Enjoy once fully cooled, or store in an airtight container.

