Craving creamy, homemade ice cream without the hassle of an ice cream maker?
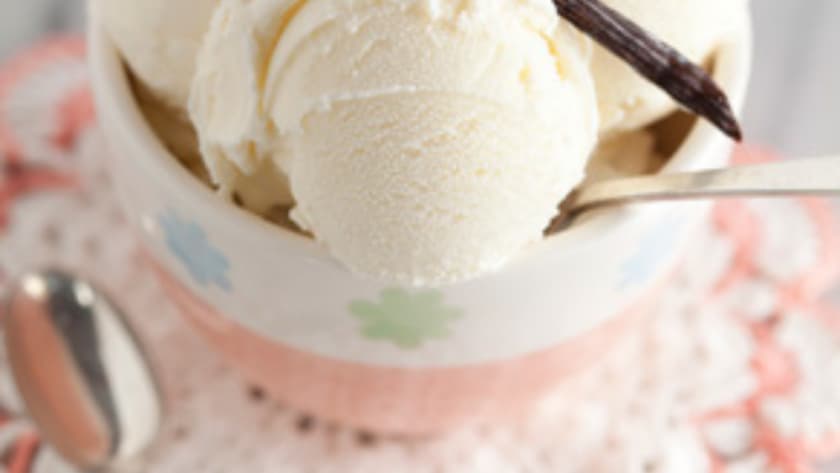
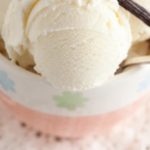
This Mary Berry No-Churn Ice Cream Recipe is the perfect solution. With just a few ingredients and no churning required, you can whip up a rich, velvety dessert that tastes like it came straight from an artisanal creamery. Mary Berry’s approach keeps it simple yet elegant—ideal for summer gatherings, family treats, or impressive desserts with minimal effort.
What is Mary Berry No-Churn Ice Cream?
The Mary Berry No Churn Ice Cream is a homemade frozen dessert that skips the machine and uses a base of sweetened condensed milk and whipped cream. This combination mimics the texture of traditional churned ice cream, creating a smooth, scoopable treat. You can add vanilla, fruit purées, chocolate chips, or any flavorings you like—it’s incredibly flexible and foolproof.

Other Popular Recipes
- Mary Berry Chocolate Birthday Cake
- Mary Berry Lemon Syllabub
- Jamie Oliver’s Overnight Oats
- Mary Berry Bavette Steak
Why You Should Try This Recipe
- No ice cream maker needed – Just a bowl, whisk, and freezer.
- Only 3 main ingredients – Cream, condensed milk, and flavoring.
- Quick to prepare – Takes 10 minutes to mix.
- Customizable – Add chocolate, fruit, nuts, or sauces.
- Ultra-creamy texture – Rich and satisfying.
- Perfect make-ahead dessert – Stores well in the freezer.
Ingredients Needed to Make Mary Berry No-Churn Ice Cream
Makes about 1 litre (serves 6–8)
- Double cream – 600ml (2½ cups)
- Sweetened condensed milk – 1 x 397g can (about 1⅓ cups)
- Vanilla extract – 1½ teaspoons
Optional Add-ins:
- Crushed berries or purée – 100g
- Chocolate chips or chunks – ½ cup
- Swirl of jam, caramel, or chocolate sauce – 2–3 tablespoons
Equipment Needed
- Large mixing bowl
- Hand or electric whisk
- Spatula
- Loaf tin or freezer-safe container
- Cling film or lid
Instructions to Make Mary Berry No-Churn Ice Cream
Step 1: Whip the Cream
- Pour double cream into a large mixing bowl.
- Whisk until soft peaks form—light and fluffy but not too stiff.
Step 2: Add Condensed Milk and Vanilla
- Gently fold in the sweetened condensed milk using a spatula.
- Add vanilla extract and continue folding until well combined.
- Avoid overmixing to keep the mixture airy.
Step 3: Add Flavors or Mix-ins (Optional)
- Fold in your chosen add-ins like fruit, chocolate chips, or sauces.
- Create swirls or layers if desired for a ripple effect.
Step 4: Freeze the Ice Cream
- Spoon the mixture into a loaf tin or container.
- Smooth the top and cover with cling film or a lid.
- Freeze for at least 6 hours, or overnight until solid.
Step 5: Serve and Enjoy
- Let sit at room temperature for 5–10 minutes before scooping.
- Scoop into bowls or cones and enjoy as is or with toppings.
What Goes Well With Mary Berry No-Churn Ice Cream
- Fresh berries and mint – A light, fruity pairing.
- Warm brownies or chocolate cake – Classic indulgence.
- Crumble topping or granola – Adds crunch.
- Fruit compotes or sauces – Enhances the base flavor.
- Waffle cones or cookie cups – Fun for presentation.
- Espresso shot – For a quick affogato.
- Drizzle of honey or maple syrup – Simple and delicious.
Expert Tips for Making the Best Mary Berry No-Churn Ice Cream
- Use full-fat cream – Ensures the creamiest texture.
- Don’t overwhip – Stop at soft peaks to maintain lightness.
- Chill the bowl and whisk – Helps cream whip faster in warm kitchens.
- Add alcohol (1 tbsp) – Like rum or Baileys to soften the texture and prevent icing.
- Create flavor combos – Mix fruits and extracts (e.g., strawberry-lime, chocolate-orange).
- Label your container – Helpful if making multiple batches.
Easy Variations of Mary Berry No-Churn Ice Cream
- Chocolate Chip Cookie Dough – Fold in chunks of cookie dough and chocolate.
- Berry Ripple – Swirl through raspberry or strawberry jam.
- Mocha Delight – Add 1 tablespoon of instant coffee + chocolate chips.
- Lemon Curd Swirl – Add 2 tablespoons of lemon curd and zest.
- Peanut Butter & Banana – Mash in banana and swirl with peanut butter.
- Mint Choc Chip – Use peppermint extract and dark chocolate pieces.
Best Practices to Store Mary Berry No-Churn Ice Cream
- Store in an airtight container – Prevents freezer burn.
- Use cling film directly on the surface – Minimizes ice crystals.
- Label with flavor and date – Stays fresh for up to 2 weeks.
- Scoop with a warmed spoon – For easier serving.
- Avoid refreezing melted portions – Affects texture.
Best Practices to Reheat (Soften) Mary Berry No-Churn Ice Cream
- Let sit at room temperature for 5–10 minutes – Softens naturally.
- Avoid microwaving – Melts unevenly and alters texture.
- Warm scoop under hot water – Makes scooping smoother.
- Store near the front of the freezer – Keeps texture consistent.
How Can I Make Mary Berry No-Churn Ice Cream Healthier?
- Use reduced-fat cream – Slightly less creamy but lighter.
- Use Greek yogurt in place of some cream – Adds tang and protein.
- Add mashed fruit instead of sugary mix-ins – Natural sweetness.
- Limit add-ins like chocolate or caramel – Keeps calories lower.
- Use vanilla bean paste instead of extract – Pure flavor without additives.
Nutrition Value (per ½ cup serving, vanilla base only):
- Calories: 220
- Fat: 16g
- Carbohydrates: 17g
- Sugar: 16g
- Protein: 3g
- Fiber: 0g
- Sodium: 45mg
FAQs
Do I need an ice cream maker to make no-churn ice cream?
No, this recipe doesn’t require an ice cream maker. It uses whipped cream and sweetened condensed milk to achieve a smooth, creamy texture without churning.
How long should I freeze no-churn ice cream before serving?
Freeze for at least 6 hours or overnight. This ensures the ice cream sets properly and becomes scoopable with a firm yet creamy texture.
Why is my no-churn ice cream icy?
Overmixing or using low-fat cream can cause iciness. For best results, use full-fat double cream and fold gently to maintain air in the mixture.
Can I use evaporated milk instead of condensed milk?
No, evaporated milk doesn’t provide the same sweetness or creamy consistency. Sweetened condensed milk is essential for the correct texture and flavor.
Final Words
This Mary Berry No Churn Ice Cream makes it easy for anyone to create luxurious, creamy ice cream at home—without any special equipment. From vanilla bean to berry swirls and chocolate chips, the possibilities are endless. It’s a summer staple (or year-round treat) that’s as impressive as it is effortless.
PrintMary Berry No Churn Ice Cream Recipe
The Mary Berry No Churn Ice Cream is a homemade frozen dessert that skips the machine and uses a base of sweetened condensed milk and whipped cream. This combination mimics the texture of traditional churned ice cream, creating a smooth, scoopable treat. You can add vanilla, fruit purées, chocolate chips, or any flavorings you like—it’s incredibly flexible and foolproof.
- Prep Time: 10
- Freezing Time: 360
- Total Time: 6 hours 10 minutes
- Yield: 6–8
- Category: Ice Cream
- Method: Freezing
- Cuisine: British
Ingredients
-
- Double cream – 600ml (2½ cups)
-
- Sweetened condensed milk – 1 x 397g can (about 1⅓ cups)
-
- Vanilla extract – 1½ teaspoons
Optional Add-ins:
-
- Crushed berries or purée – 100g
-
- Chocolate chips or chunks – ½ cup
-
- Swirl of jam, caramel, or chocolate sauce – 2–3 tablespoons
Instructions
Step 1: Whip the Cream
-
Pour double cream into a large mixing bowl.
-
Whisk until soft peaks form—light and fluffy but not too stiff.
Step 2: Add Condensed Milk and Vanilla
-
Gently fold in the sweetened condensed milk using a spatula.
-
Add vanilla extract and continue folding until well combined.
-
Avoid overmixing to keep the mixture airy.
Step 3: Add Flavors or Mix-ins (Optional)
-
Fold in your chosen add-ins like fruit, chocolate chips, or sauces.
-
Create swirls or layers if desired for a ripple effect.
Step 4: Freeze the Ice Cream
-
Spoon the mixture into a loaf tin or container.
-
Smooth the top and cover with cling film or a lid.
-
Freeze for at least 6 hours, or overnight until solid.
Step 5: Serve and Enjoy
-
Let sit at room temperature for 5–10 minutes before scooping.
-
Scoop into bowls or cones and enjoy as is or with toppings.